Escape from Black Mesa
 HL
HL

Escape from Black Mesa
by
satchmo
Posted 19 years ago2004-12-01 15:04:34 UTC •
Completed •
Half-Life
Loading...

- Name
- Escape from Black Mesa
- By
-
 satchmo
 - Type
- Map
- Engine
- Goldsource
- Game
- Half-Life
- Category
- Completed
- Included
- BSP
- Created
- 19 years ago2004-12-01 15:04:34 UTC
- Updated
- 18 years ago2005-11-12 13:42:05 UTC
- Views
- 10910
- Downloads
- 2412
- Comments
- 12
This is a re-release of an old map. I wrote a walkthrough for it recently, and I decided to update the map.
Please refer to the comment for the walkthrough. I authored the walkthrough because most players approach the gameplay with direct confrontation against the guards, thereby making it unnecessarily difficult (and frustrating).
Please refer to the comment for the walkthrough. I authored the walkthrough because most players approach the gameplay with direct confrontation against the guards, thereby making it unnecessarily difficult (and frustrating).
12 Comments
You must log in to post a comment. You can login or register a new account.
I know a small ugly map like this doesn't really deserve to have a "walkthrough", but there are so many ways to complete the map that most of you might not even realize it. If you attempt to confront the guards head-on with just your crowbar, you'll find the map extremely challenging (not to mention frustrating) indeed.
However, when I designed the map, I planned for the player to use some stealth. I guess I should say "relative" stealth, because it's impossible to be completely undetected to reach your objective. It's more like sneaking behind a guard and loading him up with lead, picking off each guard one by one. When more than one guards gang up on you with their firearms, your survival usually becomes grim.
Anyways, without further delay, here is the walkthrough.
OBJECTIVE I: BREAK OUT OF JAIL
Wait a moment for you to regain consciousness, and you'll find yourself stuck in a jail. Turn around to face away from the jail window, and in the dark corner away from the unconscious sceintist, investigate the ceiling. You should find a piece of ceiling that is somewhat displaced. Jump up to it, and a secret trap door will open up. Jump up again to gain access to the crowbar hidden there.
Use to the crowbar to smash the jail door. It takes about ten to fifteen hits to break down--it is a metal door afterall. After the door is demolished, don't walk out directly! If you do, you'll be spotted by the guards immediately and they won't have any mercy on you.
OBJECTIVE II: FIND YOUR HEV SUIT
Instead, crouch down and walk as close to the exterior of the jail as possible and sneak to your right. Walk behind the adjacent library but stop before you reach the guard waiting at the far side of that building. Save your game.
Quickly step from behind the library and show yourself to the guard waiting there. He'll open fire, but you would have had the chance to withdraw to the safety behind the wall. After a few seconds of firing at you, he'll advance to the area behind the building, and you'll hit his head with the crowbar as hard and fast as you can. It sometimes takes just two or three whacks before he's dead (he might not even have a chance to return fire). And now you have his assault rifle (Whew! Some real weapon finally).
Turn around and run to the back side of the jail house (quickly, as the guards are already aware that you've broken out). Crouch along the periphery of the jail house towards the room with the soda machine. You'll want to crouch or else the guard in the room will notice you and shoot you on sight.
If you're successful and haven't made too much noise, you'll find the guard in the soda room facing in another direction other than yours. In the crouched position, give him some head shots (and I don't mean with a camera). Stay alert after you've killed him, because usually there will be another guard running towards your direction. Be ready to shoot him dead as well.
After you've killed both of these guards, crouch-jump through the window to the soda room. You'll find your HEV suit in the back of the room. After you've donned your HEV suit, crouch-jump out of the window again. Turn around and shoot at the soda machine while trying to conserve your bullets as much as possible. When the machine explodes, you'll find a battery left on the floor. I'm sure you know what to do with it. (You wouldn't want to hit the machine with the crowbar, because once it explodes, you'll suffer some injury from the explosion if you're near it.)
OBJECTIVE III: RENDEZVOUS WITH BARNEY AT THE LEDGE
Get behind the jail house again after you've climbed out of the window from the soda room. Run quickly to the library. Climb through the window and you can find a battery on the desk. Use your crowbar to smash the bookshelf, and you can replenish your health with the healthkit if you need the boost.
Crouch-jump out of the library window facing away from the jail house towards the ammunition depot. Quickly run behind the room. If you're slow, you'll be detected by a guard in the satellite control room. Crouch down and walk slowly to the far side of the ammunition depot while pressing yourself against the wall. If you stand up or sticks out too much from the wall, the sentry gun will detect you.
Through the window of the ammunition depot, check the guard inside the room. If you've used stealth appropriately, he should be either facing away from you or in some other direction, unware of your location. Shoot him down with the remaining of your ammunition. Jump through the window into the ammunition depot and destroy those crates with your crowbar. You'll find a shotgun and a tripmine, plus some RPG ammunition for your assault rifle (Yeah, baby! Now we're talking).
Before you leave the room, turn on your flash light. You'll find a big-ass arrow pointing towards the ceiling in the ammunition room. Take the hint and jump up at the ceiling to activate the trap door, and you'll earn yourself some grenades.
Leave the room through the door but approach the main building carefully. There might be a guard in the satellite control room. Shoot him down at a distance outside the building, as he can't do too much damage to you because he only has a shotgun.
Now, you have the option of eliminating the guard on the tower with your grenade launcher or you can wait until later. It's up to you which ever way is more fun.
Before you enter the main building, sneak to the far side of the building where the generator is fenced off (by an electrified fence). Through the window there, you can shoot down the guard in the sleeping quarter (No more Xena for him!).
Get inside the sleeping quarter and load yourself up with some health boost next to the wooden couch (and collect some much-needed ammo). Before venturing into the adjacent satellite control room, be careful of another guard in the room. Mow him down first to clear the room before you reward yourself with a battery boost there.
Exit the main building again through the sleeping quarter and sneak along the wall of the main building. Install the tripmine against the wall of the building, with the laser beam pointing to the soda room. Hopefully, you've done all these without being detected by the guards.
Now, open fire to the two guards (one in the alleyway between the main building and the bathroom, the other one on the far side of the bathroom). One of them should come after you, and he'll be the victim of the tripmine trap you've set up earlier. There is a healthkit inside the bathroom if you need it.
Proceed to the front of the main building along the wall to avoid the sentry gun. Get to the front corner of the building where the generator is located (you can see the sign "High Voltage" on the fence). The sentry gun is right above you. Throw a well-aimed grenade or two towards the roof of the building to destroy the gun and the guard up there.
When that's accomplished, gain access to the roof via the ladder in the alleyway facing the bathroom. Quickly dock under the observation tower to avoid the RPG fire from the guard on top (and treat yourself with more grenades in there). When you peek out, lob a grenade onto the tower platform and hear him splatter. Grab his grenade launcher ammo on the tower afterwards.
Move back down to the mesa level and approach the ladder leading down the plateau carefully. There is still a guard down there waiting for you. You can choose your favorite weapon to eliminate him (I prefer the RPG--it's just so damn satisfying to launch!).
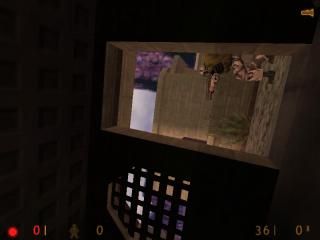
Climb down the ladder carefully to the ledge, but Barney isn't there. You have to jump to the impossibly thin ledge along the rock wall across from you. Make sure, however, you don't actually jump! If you do, you'll hit your head on the rock formation protruding out and you'll fall to your death. Instead, just run fast and let yourself fall to the thin ledge.
Turn around, and this time, jump to the ladder on the rock wall facing you. Hopefully you'll grab on to the ladder instead of falling all the way down. Climb down the ladder and rendezvous with Barney!
THE END
The map will immediately return you to the OEM menu at this point. It's not a bug, it's just an abrupt end to your adventure. Sorry, no victory music for this map.
I hope you've enjoyed this map, and my walkthrough has enhanced your appreciation for the gameplay. It took me a while to fine-tune the gameplay and the position of the grunts and info_nodes. It is, however, my first map, and I am aware of the meager architecture and texture.
Feel free to comment.
Ladders don't extend right to the top of things, so unless your careful, you fall easily, which may have been done intentionally?
Great gameplay and fun, I completed the course with a couple of trys and without the stupidly big walkthrough--I shouldn't make fun, I'm longwinded a lot as well--, but it shows you're thoughtful.
Nice clean layout, which might make a nice cs/de/fy map or part of one. Nice detail and pretty much everything else.
Great Job!
Remember, this was the first map I have ever released. So I had not figured out all the mapping tricks yet at the time. Notice the bad vertex manipulation?
Even I had to try it many times before beating it without dying, and I am the mapper!
I still play it myself sometimes, and soon my ten-year-old son will play it for the first time. It is older than he is.